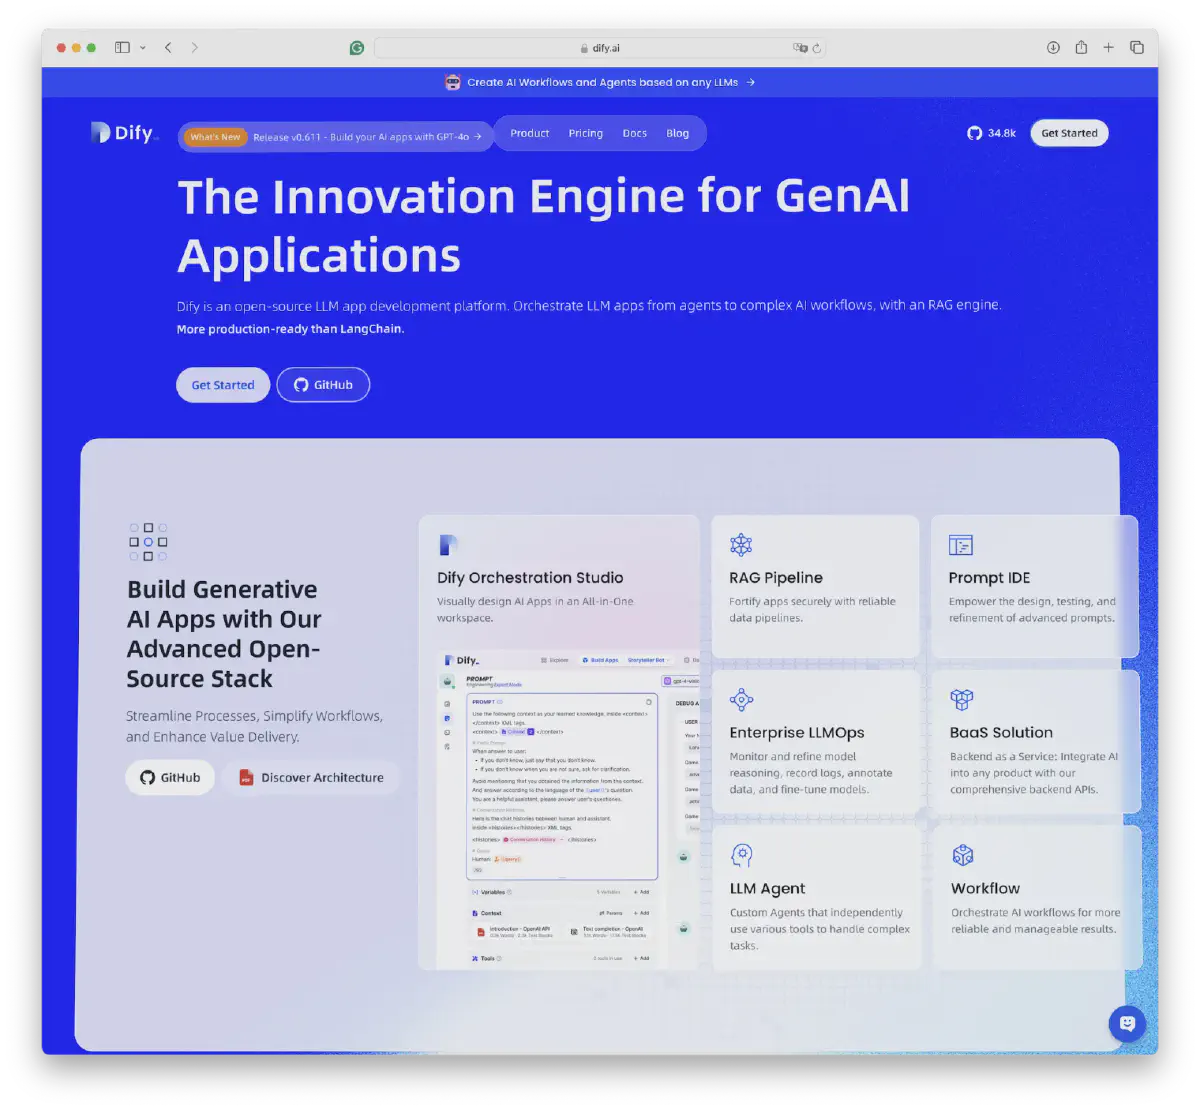

Dify – The Innovation Engine for GenAI Applications
Dify is an open-source LLM app development platform. Orchestrate LLM apps from agents to complex AI workflows, with an RAG engine. Which claims to be more production-ready than LangChain.
Of course, a workflow orchestration software like this needs a database underneath — Dify uses PostgreSQL for meta data storage, as well as Redis for caching and a dedicated vector database. You can pull the Docker images and play locally, but for production deployment, this setup won’t suffice — there’s no HA, backup, PITR, monitoring, and many other things.
Fortunately, Pigsty provides a battery-include production-grade highly available PostgreSQL cluster, along with the Redis and S3 (MinIO) capabilities that Dify needs, as well as Nginx to expose the Web service, making it the perfect companion for Dify.
Off-load the stateful part to Pigsty, you only need to pull up the stateless blue circle part with a simple
docker compose up.
BTW, I have to criticize the design of the Dify template. Since the metadata is already stored in PostgreSQL, why not add pgvector to use it as a vector database? What’s even more baffling is that pgvector is a separate image and container. Why not just use a PG image with pgvector included?
Dify “supports” a bunch of flashy vector databases, but since PostgreSQL is already chosen, using pgvector as the default vector database is the natural choice. Similarly, I think the Dify team should consider removing Redis. Celery task queues can use PostgreSQL as backend storage, so having multiple databases is unnecessary. Entities should not be multiplied without necessity.
Therefore, the Pigsty-provided Dify Docker Compose template has made some adjustments to the official example. It removes the db and redis database images, using instances managed by Pigsty. The vector database is fixed to use pgvector, reusing the same PostgreSQL instance.
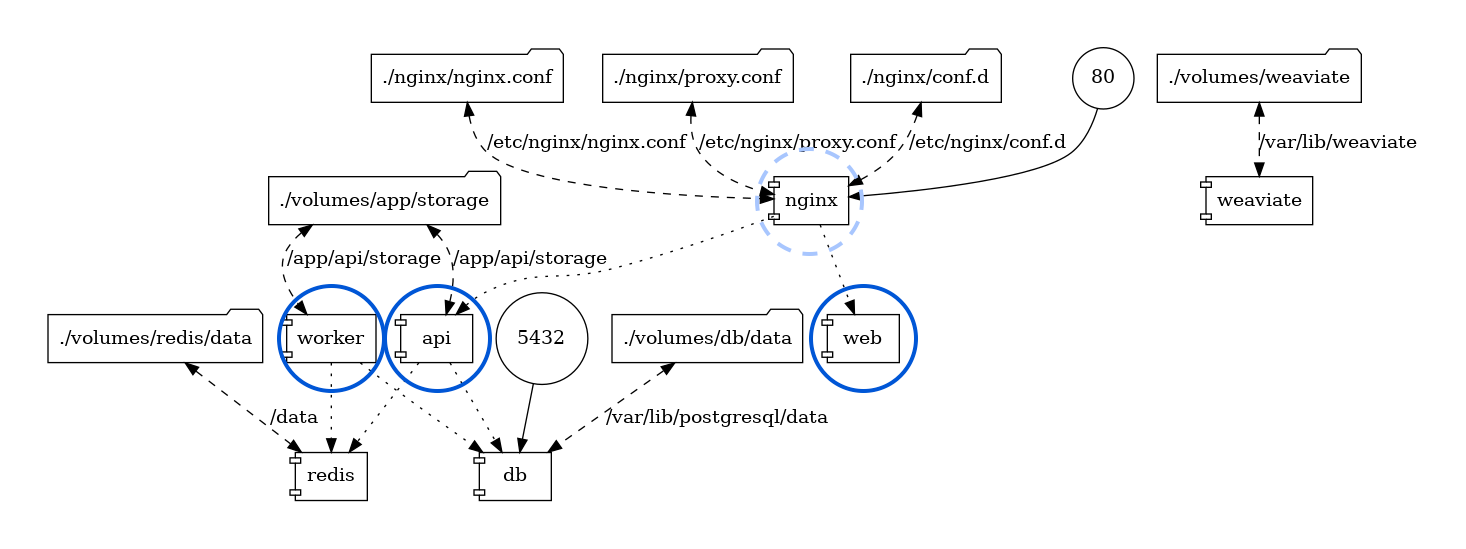
In the end, the architecture is simplified to three stateless containers: dify-api, dify-web, and dify-worker, which can be created and destroyed at will. There are also two optional containers, ssrf_proxy and nginx, for providing proxy and some security features.
There’s a bit of state management left with file system volumes, storing things like private keys. Regular backups are sufficient.
Reference:
Pigsty Preparation#
Let’s take the single-node installation of Pigsty as an example. Suppose you have a machine with the IP address 10.10.10.10 and already pigsty installed.
We need to define the database clusters required in the Pigsty configuration file pigsty.yml.
Here, we define a cluster named pg-meta, which includes a superuser named dbuser_dify (the implementation is a bit rough as the Migration script executes CREATE EXTENSION which require dbsu privilege for now),
And there’s a database named dify with the pgvector extension installed, and a specific firewall rule allowing users to access the database from anywhere using a password (you can also restrict it to a more precise range, such as the Docker subnet 172.0.0.0/8).
Additionally, a standard single-instance Redis cluster redis-dify with the password redis.dify is defined.
pg-meta:
  hosts: { 10.10.10.10: { pg_seq: 1, pg_role: primary } }
  vars:
    pg_cluster: pg-meta
    pg_users: [ { name: dbuser_dify ,password: DBUser.Dify  ,superuser: true ,pgbouncer: true ,roles: [ dbrole_admin ] } ]
    pg_databases: [ { name: dify, owner: dbuser_dify, extensions: [ { name: pgvector } ] } ]
    pg_hba_rules: [ { user: dbuser_dify , db: all ,addr: world ,auth: pwd ,title: 'allow dify user world pwd access' } ]

redis-dify:
  hosts: { 10.10.10.10: { redis_node: 1 , redis_instances: { 6379: { } } } }
  vars: { redis_cluster: redis-dify ,redis_password: 'redis.dify' ,redis_max_memory: 64MB }
For demonstration purposes, we use single-instance configurations. You can refer to the Pigsty documentation to deploy high availability PG and Redis clusters. After defining the clusters, use the following commands to create the PG and Redis clusters:
bin/pgsql-add  pg-meta                # create the dify database cluster
bin/redis-add  redis-dify             # create redis cluster
Alternatively, you can define a new business user and business database on an existing PostgreSQL cluster, such as pg-meta, and create them with the following commands:
bin/pgsql-user pg-meta dbuser_dify    # create dify biz user
bin/pgsql-db   pg-meta dify           # create dify biz database
You should be able to access PostgreSQL and Redis with the following connection strings, adjusting the connection information as needed:
psql postgres://dbuser_dify:DBUser.Dify@10.10.10.10:5432/dify -c 'SELECT 1'
redis-cli -u redis://redis.dify@10.10.10.10:6379/0 ping
Once you confirm these connection strings are working, you’re all set to start deploying Dify.
For demonstration purposes, we’re using direct IP connections. For a multi-node high availability PG cluster, please refer to the service access section.
The above assumes you are already a Pigsty user familiar with deploying PostgreSQL and Redis clusters. You can skip the next section and proceed to see how to configure Dify.
Starting from Scratch#
If you’re already familiar with setting up Pigsty, feel free to skip this section.
Prepare a fresh Linux x86_64 node that runs compatible OS, then run as a sudo-able user:
curl -fsSL https://repo.pigsty.io/get | bashIt will download Pigsty source to your home, then perform configure and install to finish the installation.
cd ~/pigsty   # get pigsty source and entering dir
./bootstrap   # download bootstrap pkgs & ansible [optional]
./configure   # pre-check and config templating   [optional]

# change pigsty.yml, adding those cluster definitions above into all.children

./install.yml # install pigsty according to pigsty.yml
You should insert the above PostgreSQL cluster and Redis cluster definitions into the pigsty.yml file, then run install.yml to complete the installation.
Redis Deploy
Pigsty will not deploy redis in install.yml, so you have to run redis.yml playbook to install Redis explicitly:
./redis.ymlDocker Deploy
Pigsty will not deploy Docker by default, so you need to install Docker with the docker.yml playbook.
./docker.ymlDify Confiugration#
You can configure dify in the .env file:
All parameters are self-explanatory and filled in with default values that work directly in the Pigsty sandbox env. Fill in the database connection information according to your actual conf, consistent with the PG/Redis cluster configuration above.
Changing the SECRET_KEY field is recommended. You can generate a strong key with openssl rand -base64 42:
# meta parameter
DIFY_PORT=8001 # expose dify nginx service with port 8001 by default
LOG_LEVEL=INFO # The log level for the application. Supported values are `DEBUG`, `INFO`, `WARNING`, `ERROR`, `CRITICAL`
SECRET_KEY=sk-9f73s3ljTXVcMT3Blb3ljTqtsKiGHXVcMT3BlbkFJLK7U # A secret key for signing and encryption, gen with `openssl rand -base64 42`

# postgres credential
PG_USERNAME=dbuser_dify
PG_PASSWORD=DBUser.Dify
PG_HOST=10.10.10.10
PG_PORT=5432
PG_DATABASE=dify

# redis credential
REDIS_HOST=10.10.10.10
REDIS_PORT=6379
REDIS_USERNAME=''
REDIS_PASSWORD=redis.dify

# minio/s3 [OPTIONAL] when STORAGE_TYPE=s3
STORAGE_TYPE=local
S3_ENDPOINT='https://sss.pigsty'
S3_BUCKET_NAME='infra'
S3_ACCESS_KEY='dba'
S3_SECRET_KEY='S3User.DBA'
S3_REGION='us-east-1'
Now we can pull up dify with docker compose:
cd pigsty/app/dify && make upExpose Dify Service via Nginx#
Dify expose web/api via its own nginx through port 80 by default, while pigsty uses port 80 for its own Nginx. T
herefore, we expose Dify via port 8001 by default, and use Pigsty’s Nginx to forward to this port.
Change infra_portal in pigsty.yml, with the new dify line:
infra_portal:                     # domain names and upstream servers
  home         : { domain: h.pigsty }
  grafana      : { domain: g.pigsty ,endpoint: "${admin_ip}:3000" , websocket: true }
  prometheus   : { domain: p.pigsty ,endpoint: "${admin_ip}:9090" }
  alertmanager : { domain: a.pigsty ,endpoint: "${admin_ip}:9093" }
  blackbox     : { endpoint: "${admin_ip}:9115" }
  loki         : { endpoint: "${admin_ip}:3100" }

  dify         : { domain: dify.pigsty ,endpoint: "10.10.10.10:8001", websocket: true }
Then expose dify web service via Pigsty’s Nginx server:
./infra.yml -t nginxDon’t forget to add dify.pigsty to your DNS or local /etc/hosts / C:\Windows\System32\drivers\etc\hosts to access via domain name.